DITO SIM Activation Guide: Step-by-Step Instructions to Get Started Fast
DITO Telecommunity has quickly become one of the most talked-about telecom providers in the Philippines. With its affordable promos, fast internet, and expanding coverage, it’s no surprise that more and more Filipinos are making the switch to DITO.
But before you can enjoy all the perks—like surfing the web, making calls, and sending messages—you need to activate your SIM card properly. It’s a quick and important step that ensures your SIM is recognized by the network and ready for use.
This DITO SIM activation guide will help you start using your SIM quickly and without stress. Whether you’re a new subscriber or helping someone set up their phone, follow along and you’ll be connected in no time.
Types of DITO SIMs You Can Activate
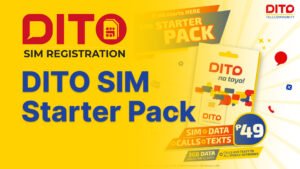
Before jumping into the activation steps, it’s good to know what kind of DITO SIM you’re working with. DITO offers two types of SIM cards to fit different devices and user preferences:
- Physical SIM Card
This is the traditional SIM that most users are familiar with. You can insert it into the SIM slot of your phone. It’s widely compatible with most smartphones and is easy to install and replace. - eSIM (Embedded SIM)
If you’re using a newer phone that supports eSIM technology, you can go completely digital. eSIM lets you activate your DITO number without needing a physical card. It’s perfect for devices like iPhones (XS and newer) and select Samsung or Android phones.
Where to Get a DITO SIM
You can grab a DITO SIM in several convenient ways:
- Order online from the official DITO website or e-commerce platforms
- Visit any DITO Experience Store near you
- Buy from partner retailers, mobile kiosks, or convenience stores
Once you have your SIM in hand (or loaded on your phone, in the case of eSIM), you’re ready for the next step—activation!
What You Need Before DITO SIM Activation Guide
Before you jump into activating your DITO SIM, make sure you have everything ready. Having these things on hand will make the process smooth and hassle-free.
Here’s what you’ll need:
- A DITO-compatible smartphone
Make sure your phone supports DITO’s network. Most 4G and 5G unlocked phones work well with DITO. - Stable internet or mobile data connection
You’ll need a reliable internet connection, especially during the SIM registration process through the app. - A valid ID for registration
In compliance with the SIM Registration Act in the Philippines, you must submit a valid government-issued ID. Keep it close when registering. - DITO app downloaded (available on Android/iOS)
The DITO app is your main tool for SIM activation, registration, checking data, and managing your account. Download it in advance to save time.
How to DITO SIM Activation Physical (Step-by-Step)
Activating your DITO SIM Activation physical is simple — just follow these steps, and you’ll be up and running in minutes:
Step 1: Insert the SIM into your phone
Carefully place your new DITO SIM into your phone’s SIM slot. Make sure your device is turned off when inserting it to avoid any glitches.
Step 2: Turn on mobile data
Power on your phone and enable mobile data. This helps your phone connect to DITO’s network automatically.
Step 3: Receive welcome text from DITO
If your phone is compatible, you’ll see signal bars appear, and shortly after, a welcome SMS from DITO should arrive. This means your SIM is detected.
Step 4: Download and open the DITO app
Head to the Google Play Store or Apple App Store, download the official DITO app, and open it. The app will walk you through registration and activation.
Step 5: Register your SIM with valid details and upload ID/selfie
Follow the on-screen prompts to enter your personal info, upload a valid government-issued ID, and take a quick selfie for identity verification — this is required by law.
Step 6: Wait for confirmation text — SIM is now active!
Once everything is submitted, you’ll receive a confirmation message. Your SIM is now active and ready for calls, texts, and data.
How to Activate a DITO eSIM (Step-by-Step)
Activating a DITO eSIM is quick and convenient — no need for physical cards or waiting in line. Here’s exactly how you can get started:
Step 1: Make sure your phone supports eSIM
Before anything else, check if your smartphone supports eSIM. Most newer iPhones (iPhone XS and up), some Samsung Galaxy models, and select Android phones come with eSIM compatibility. If you’re unsure, you can double-check on DITO’s official website.
Step 2: Purchase your DITO eSIM
You can buy an eSIM directly from the DITO app or through their official online partners. After purchase, you’ll receive a QR code — this is what you’ll scan to activate your eSIM.
Step 3: Scan the QR code
Go to your phone’s Settings > Mobile Network (or Cellular) > Add eSIM. Scan the QR code provided by DITO. The system will begin downloading and installing the eSIM profile instantly.
Step 4: Open the DITO app and complete registration
Launch the DITO app, log in (or create an account), and follow the instructions to register your SIM. You’ll need to upload a valid ID and take a selfie for verification, just like with a physical SIM.
Step 5: Confirm activation
Once everything is set, you’ll receive an SMS or in-app notification confirming that your DITO eSIM is now active and ready to use. You can now enjoy data, calls, and texts right from your eSIM-enabled device — no plastic required.
Common Issues During DITO SIM Activation (And How to Fix Them)
Sometimes, even when you follow all the steps correctly, a few hiccups can happen during DITO SIM Activation. Don’t worry — most of these are easy to fix with a little patience and the right tips.
No signal after inserting SIM
If your phone shows “No Service” or doesn’t recognize the SIM, try restarting your phone. Also, make sure your device is DITO-compatible and that the SIM is properly inserted (for physical SIMs). For eSIM, double-check that the installation went through and the mobile plan is activated in your settings.
Not receiving the welcome text
The welcome message from DITO usually appears within minutes. If it doesn’t, check if mobile data is turned on. Sometimes switching to airplane mode and then back off helps refresh the signal. You can also open the DITO app to check your activation status.
ID or selfie upload not working
Uploading your ID or selfie might fail due to slow internet or poor image quality. Make sure you’re connected to a stable Wi-Fi or mobile data network. Use a well-lit space for your selfie and make sure your ID is clearly visible. If it still fails, close and reopen the app, or reinstall it if needed.
DITO app not detecting SIM
If the app says “No DITO SIM found,” double-check that your SIM is inserted (or eSIM is installed correctly). Restart the phone and open the app again. If you’re on Wi-Fi, ensure mobile data is also enabled, as the app sometimes checks via your network.
Frequently Asked Questions (FAQs)
Conclusion
Activating your DITO SIM Activation is quick, easy, and sets you up for an affordable, data-friendly experience. Whether you’re using a physical SIM or an eSIM, the process is designed to be smooth — especially with the help of the DITO app.
This DITO SIM activation guide gave you step-by-step instructions, common fixes, and essential tips to get started without frustration. Remember: a successful DITO SIM Activation means you’re ready to enjoy fast internet, reliable calls, and exciting promos from one of the Philippines’ fastest-growing networks.
Ready to begin? Download the DITO app now and activate your SIM today — your digital journey starts here.


